
2×72 Belt Sander Plans: A Comprehensive Guide
Are you looking to build your own 2×72 belt sander? If so, you’ve come to the right place. In this detailed guide, we’ll explore everything you need to know about creating your own 2×72 belt sander plans. From the materials and tools required to the step-by-step instructions, we’ll cover it all.
Understanding the 2×72 Belt Sander

The 2×72 belt sander is a versatile tool used for sanding and finishing wood projects. It features a 2-inch wide belt and a 72-inch sanding surface, making it ideal for large projects. This type of sander is perfect for smoothing out rough edges, removing paint, and achieving a smooth finish on your woodwork.
Materials and Tools Needed

Before you start building your 2×72 belt sander, you’ll need to gather the following materials and tools:
| Material | Quantity |
|---|---|
| 1×4 lumber | 4 feet |
| 2×4 lumber | 2 feet |
| 1/4-inch plywood | 1 sheet |
| 1/2-inch plywood | 1 sheet |
| 1-inch dowels | 4 |
| Wood screws | 2-inch and 1-inch |
| Belt sander motor | 1 |
| Belts | 2 |
| Wood glue | 1 tube |
| Sanding paper | various grits |
| Wood finish | optional |
Tools needed:
- Saw (hand saw, circular saw, or miter saw)
- Sander (hand sander or orbital sander)
- Drill and drill bits
- Hammer
- Clamps
- Level
- Measuring tape
- Wood chisel
- File
Building the Frame
Start by building the frame of your 2×72 belt sander. Cut the 1×4 lumber to the desired length for the sides and top of the frame. Attach the sides to the top using wood screws and wood glue. Make sure the frame is square and level before proceeding.
Attaching the Motor
Next, attach the belt sander motor to the frame. Place the motor on top of the frame and mark the mounting holes. Drill pilot holes and secure the motor to the frame using wood screws. Ensure the motor is securely mounted and aligned with the belt path.
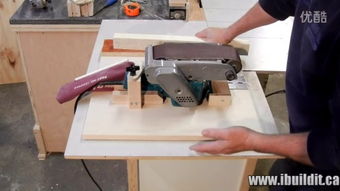
Building the Sanding Table
Construct the sanding table using 1/4-inch and 1/2-inch plywood. Cut the plywood to the desired size and shape. Attach the 1/4-inch plywood to the frame using wood screws and wood glue. Then, attach the 1/2-inch plywood to the top of the 1/4-inch plywood using wood screws and wood glue.
Attaching the Belt
Now it’s time to attach the belt to the motor. Place the belt on the motor’s pulley and secure it using the tensioning mechanism. Adjust the tension until the belt is tight and runs smoothly. Attach the other end of the belt to the sanding table using a belt tensioner