
When Installing Sandpaper, Make Sure You Follow These Detailed Steps
When it comes to installing sandpaper, precision and care are key to achieving a smooth and professional finish. Whether you’re a DIY enthusiast or a professional, understanding the nuances of sandpaper installation can make a significant difference in the quality of your work. In this article, we’ll delve into the essential steps and considerations to ensure a successful sandpaper installation.
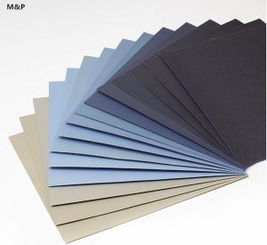
Choosing the Right Sandpaper

Before you begin, it’s crucial to select the appropriate sandpaper for your project. Sandpaper comes in various grades, grit sizes, and materials. Here’s a quick guide to help you make the right choice:
| Grade | Material | Use |
|---|---|---|
| Coarse | Aluminum oxide | Removing paint, rust, or rough surfaces |
| Medium | Aluminum oxide | Preparation for finishing sandpaper |
| Fine | Aluminum oxide | Finishing sandpaper for a smooth surface |
| Very Fine | Silicon carbide | Finishing sandpaper for a high-quality finish |
Preparing the Surface

Before installing sandpaper, ensure that the surface you’re working on is clean, dry, and free of any debris. This will help you achieve a more even and effective sanding process. Here are some tips for surface preparation:
- Remove any loose paint, rust, or dirt from the surface.
- Use a wire brush or a scraper to remove any stubborn material.
- Wipe the surface with a damp cloth to remove any remaining dust or debris.
- Allow the surface to dry completely before proceeding.
Installing Sandpaper
Now that your surface is prepared, it’s time to install the sandpaper. Here’s a step-by-step guide to ensure a proper installation:
- Choose the appropriate sandpaper grade and grit size for your project.
- Attach the sandpaper to a sanding block or a sanding machine, depending on your preference.
- Make sure the sandpaper is securely fastened to the block or machine to prevent it from slipping during use.
- Start sanding in a straight, consistent motion, applying even pressure across the surface.
- Change the sandpaper as needed to maintain a consistent grit size and finish.
Proper Sanding Techniques
Using the right technique is essential for achieving a smooth and even finish. Here are some tips to help you sand effectively:
- Use a sanding block to maintain a consistent pressure and prevent marring the surface.
- Sand in the direction of the wood grain to avoid creating swirl marks.
- Work in small sections, moving the sandpaper in a circular motion to remove any remaining imperfections.
- Check your progress regularly to ensure a uniform finish.
Cleaning and Maintenance
After you’ve completed the sanding process, it’s important to clean and maintain your sandpaper and sanding equipment. Here’s how to do it:
- Remove the sandpaper from the sanding block or machine.
- Wipe the sandpaper with a damp cloth to remove any dust or debris.
- Store the sandpaper in a dry, cool place to prevent it from becoming brittle or losing its effectiveness.
- Regularly inspect your sanding blocks and machines for any signs of wear or damage, and replace them as needed.
Conclusion
Installing sandpaper may seem like a simple task, but following these detailed steps and considerations can make a significant difference in the quality of your work. By choosing the right sandpaper, preparing the surface, using proper sanding techniques, and maintaining your equipment, you’ll be well on your way