
Belt Sander Standing: A Comprehensive Guide
Are you looking to enhance your woodworking skills or tackle a DIY project? A belt sander is an essential tool that can help you achieve smooth, professional results. In this article, we will delve into the details of a belt sander standing, providing you with a multi-dimensional introduction to help you make an informed decision.
Understanding the Basics

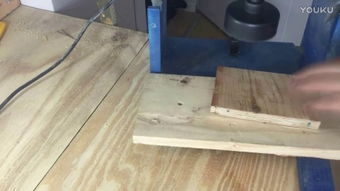
A belt sander standing is a powerful tool designed to sand wood surfaces efficiently. It features a continuous belt that moves back and forth, removing material and creating a smooth finish. The standing model is ideal for larger projects and offers greater stability and control compared to handheld sanders.
Key Features
When considering a belt sander standing, there are several key features to keep in mind:
| Feature | Description |
|---|---|
| Motor Power | Look for a motor with at least 3-4 horsepower for optimal performance. |
| Speed Control | Variable speed control allows you to adjust the sanding speed according to the material and desired finish. |
| Table Size | A larger table surface provides more workspace and allows for sanding larger pieces of wood. |
| Portability | Consider a model that is easy to move and store, especially if you have limited space. |
| Safety Features | Look for features like a dust collection system, safety guards, and a lock-on switch to ensure a safe working environment. |
Choosing the Right Belt Sander Standing

With so many options available, it can be challenging to choose the right belt sander standing. Here are some factors to consider:
1. Budget: Determine how much you are willing to spend on a belt sander standing. Prices can range from $100 to over $500, depending on the features and brand.
2. Brand Reputation: Research different brands and read reviews to find a reputable manufacturer known for producing high-quality tools.
3. Warranty: A good warranty can provide peace of mind and protect your investment. Look for a warranty that covers both parts and labor.
4. User Reviews: Read reviews from other users to get an idea of the tool’s performance, durability, and ease of use.
Using a Belt Sander Standing
Once you have chosen a belt sander standing, it’s important to learn how to use it properly to achieve the best results:
1. Safety First: Always wear appropriate safety gear, such as safety glasses, gloves, and ear protection.
2. Sanding Technique: Place the wood on the table and start sanding with a gentle, even pressure. Avoid pressing too hard, as this can cause the belt to skip or damage the wood.
3. Sanding Pattern: Move the belt in a straight line across the wood, following the grain. Avoid sanding in circles or diagonals, as this can create an uneven finish.
4. Sandpaper Selection: Use the appropriate grit of sandpaper for the material and desired finish. Start with a coarse grit and gradually move to a finer grit for a smoother finish.
Care and Maintenance
Proper care and maintenance are essential to ensure the longevity of your belt sander standing:
1. Clean the Belt: After each use, clean the belt to remove any debris or wood particles. This will help prevent clogs and maintain the belt’s performance.
2. Oil the Bearings: Regularly oil the bearings to keep the sander running smoothly and prevent wear.
3. Check for Wear: Inspect the belt and sandpaper regularly for signs of wear and replace them as needed.
4. Store Properly: When not in use, store your belt s