
Understanding the Drill Sanding Bit: A Comprehensive Guide
When it comes to sanding operations, the drill sanding bit is a crucial tool that can significantly impact the quality and efficiency of your work. Whether you are a professional woodworker or a DIY enthusiast, understanding the intricacies of a drill sanding bit can make all the difference. In this article, we will delve into the details of what a drill sanding bit is, its various types, and how to use it effectively.
What is a Drill Sanding Bit?

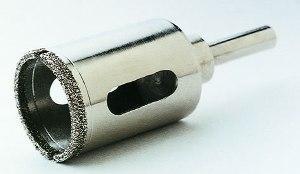
A drill sanding bit is a specialized tool designed to be used with a power drill. It is primarily used for sanding curved or contoured surfaces that are difficult to reach with traditional sandpaper. These bits are made from durable materials like carbide or diamond, which provide excellent abrasive properties for sanding tasks.
Types of Drill Sanding Bits
There are several types of drill sanding bits available, each designed for specific sanding applications. Here are some of the most common types:
| Type | Description |
|---|---|
| Conical Sanding Bit | Used for sanding contoured surfaces like bowls or cups. |
| Fluted Sanding Bit | Features flutes that help in removing material quickly and efficiently. |
| Conical Fluted Sanding Bit | Combines the features of a conical and fluted bit, making it versatile for various sanding tasks. |
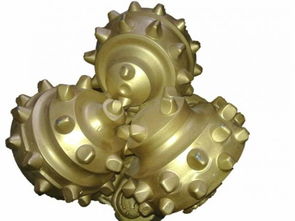
| Conical Diamond Sanding Bit | Utilizes diamond particles for aggressive sanding on hard materials like glass or stone. |
Each type of drill sanding bit has its unique features and is suitable for different sanding applications. It is essential to choose the right bit based on the material you are working with and the specific sanding task at hand.
How to Use a Drill Sanding Bit
Using a drill sanding bit correctly is crucial to achieve the desired results. Here are some tips to help you use it effectively:
-
Choose the right bit: As mentioned earlier, select the appropriate bit based on the material and sanding task.
-
Secure the bit: Ensure that the bit is securely attached to the drill. A loose bit can cause damage to the workpiece or the drill.
-
Adjust the speed: Set the drill speed to a moderate level. High speeds can generate too much heat, which may damage the material or the bit.
-
Start slowly: Begin sanding at a slow pace to avoid gouging the workpiece. Gradually increase the speed as you become more comfortable with the bit.
-
Use a steady hand: Maintain a steady hand and apply even pressure while sanding. This will help in achieving a smooth and consistent finish.
-
Change the bit when necessary: If the bit becomes dull or worn out, replace it with a new one to maintain the quality of your sanding work.
By following these tips, you can effectively use a drill sanding bit to achieve professional results in your sanding projects.
Benefits of Using a Drill Sanding Bit
Using a drill sanding bit offers several advantages over traditional sanding methods:
-
Increased efficiency: Drill sanding bits can cover larger areas in less time, making the sanding process faster and more efficient.
-
Improved precision: These bits allow for sanding in tight spaces and on contoured surfaces, providing better control and precision.
-
Reduced effort: The power of the drill helps in sanding materials that would be difficult to sand by hand.
-
Consistent finish: Drill sanding bits ensure a consistent finish, as they apply even pressure throughout the sanding process.
With these benefits, it’s no wonder that drill sanding bits have become a popular choice among woodworkers and DIY enthusiasts alike.
Conclusion
Understanding the drill