
1 x 42 Belt Sander: A Comprehensive Guide
Are you in the market for a reliable and versatile belt sander? Look no further than the 1 x 42 belt sander. This powerful tool is a favorite among woodworkers, DIY enthusiasts, and professionals alike. In this detailed guide, we’ll explore the features, benefits, and usage tips of the 1 x 42 belt sander to help you make an informed decision.
Key Features of the 1 x 42 Belt Sander

The 1 x 42 belt sander is known for its robust construction and impressive performance. Here are some of its standout features:
| Feature | Description |
|---|---|
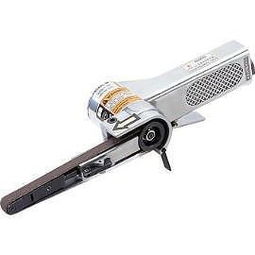
| Size | 1 x 42 inches, providing ample workspace for large projects |
| Power | Variable speed control for different sanding applications |
| Motor | High-quality motor for smooth and efficient sanding |
| Adjustable Table | Adjustable table for sanding at various angles and depths |
| Safety Features | Overload protection and dust collection system for a safe working environment |
These features make the 1 x 42 belt sander an excellent choice for a wide range of sanding tasks, from smoothing rough surfaces to creating intricate patterns.
Benefits of Using the 1 x 42 Belt Sander
Investing in a 1 x 42 belt sander offers numerous benefits, including:
-
Increased Efficiency: The large sanding surface allows you to work on larger projects without the need for multiple passes.
-
Improved Sanding Quality: The variable speed control and adjustable table ensure a consistent and precise finish.
-
Reduced Effort: The powerful motor and ergonomic design make sanding tasks less tiring and more enjoyable.
-
Cost-Effective: The 1 x 42 belt sander is a long-lasting investment that can save you money on sanding services.
How to Use the 1 x 42 Belt Sander

Using the 1 x 42 belt sander is a straightforward process. Here’s a step-by-step guide to help you get started:
-
Secure the workpiece: Place your workpiece on the sander’s table and secure it using clamps or a vise.
-
Adjust the table: Set the table to the desired angle and depth for your sanding task.
-
Attach the belt: Insert the appropriate sanding belt into the sander and secure it in place.
-
Start the sander: Turn on the sander and gradually lower the belt onto the workpiece.
-
Sanding technique: Move the sander across the workpiece in a consistent, even motion to achieve the desired finish.
-
Change belts: Replace the sanding belt when it becomes worn or damaged.
Maintenance and Care
Proper maintenance is essential to ensure the longevity and performance of your 1 x 42 belt sander. Here are some tips:
-
Clean the sander: Regularly clean the sander’s table, belt, and motor to prevent dust buildup and ensure smooth operation.
-
Check the belt tension: Ensure that the belt is properly tensioned to prevent slippage and damage to the sander.
-
Inspect the motor: Regularly inspect the motor for signs of wear or damage and replace it if necessary.
-
Store the sander properly: Keep the sander in a dry, well-ventilated area when not in use.
Conclusion
The 1 x 42 belt sander is a versatile