
Rigid Belt Sander: A Comprehensive Guide
Are you looking to enhance your woodworking or metalworking projects? A rigid belt sander might just be the tool you need. This versatile machine can help you achieve smooth, even finishes on a variety of materials. In this article, we’ll delve into the details of a rigid belt sander, covering its features, benefits, and how to use it effectively.
Understanding the Basics

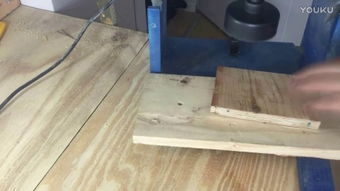
A rigid belt sander is a powerful tool designed to sand and finish wood, metal, and other materials. Unlike orbital sanders, which use a rotating pad, rigid belt sanders use a continuous belt that moves back and forth. This design allows for a more aggressive sanding action, making it ideal for larger surfaces and more demanding projects.
Here’s a quick overview of the key components of a rigid belt sander:
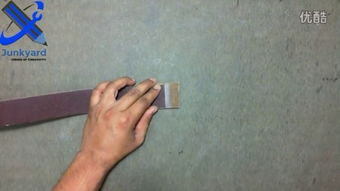
- Belt: The sanding belt is the heart of the machine. It’s made of abrasive material and comes in various grit sizes to accommodate different sanding needs.
- Drive Motor: The motor powers the belt, providing the necessary force for sanding.
- Table: The table is where you place the material you want to sand. It should be flat and stable to ensure accurate sanding.
- Adjustable Table: Some models come with an adjustable table, allowing you to sand materials at different angles.
- On/Off Switch: This is the control for turning the machine on and off.
Benefits of Using a Rigid Belt Sander
There are several advantages to using a rigid belt sander:
- Efficiency: Rigid belt sanders can cover large surfaces quickly, making them ideal for projects that require a lot of sanding.
- Even Sanding: The continuous movement of the belt ensures an even sanding action, reducing the risk of uneven finishes.
- Customization: With various grit sizes and belt types available, you can tailor the sanding process to your specific needs.
- Cost-Effective: Rigid belt sanders are generally more affordable than other high-powered sanding tools.
Choosing the Right Rigid Belt Sander
When selecting a rigid belt sander, consider the following factors:
- Motor Power: Look for a machine with a motor that provides enough power for your projects. A motor ranging from 3 to 5 horsepower is typically sufficient for most applications.
- Belt Size: The size of the belt will determine the maximum width of material you can sand. Common belt sizes range from 4 to 6 inches.
- Table Size: A larger table will give you more room to work with, but it may also be heavier and more difficult to move.
- Adjustable Table: If you plan to sand materials at different angles, an adjustable table is a valuable feature.
- Price: Set a budget and look for a machine that offers the best value for your money.
Using a Rigid Belt Sander
Here’s a step-by-step guide on how to use a rigid belt sander:
- Prepare the Material: Ensure the material you want to sand is clean and dry. If necessary, clamp it securely to the table.
- Select the Right Belt: Choose a belt with the appropriate grit size for your project. For rough sanding, use a coarse grit, and for finishing, use a finer grit.
- Adjust the Table: If your sander has an adjustable table, set it to the desired angle.
- Start the Machine: Turn on the sander and let it warm up for a few minutes.
- Sand the Material: Place the material on the table and move it back and forth across the belt. Avoid pressing too hard, as this can damage the material or the belt.
- Check the Finish: Periodically inspect the material to ensure an even finish. If necessary, adjust the grit size or table angle.
-