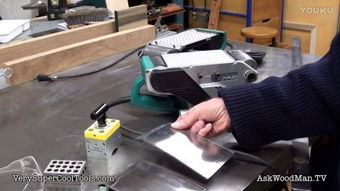
Belt Sander Knife Making: A Comprehensive Guide
Are you interested in crafting your own knives? If so, you might have considered using a belt sander for the job. Belt sanders are versatile tools that can be used for a variety of woodworking tasks, including knife making. In this article, we will delve into the process of using a belt sander for knife making, covering everything from selecting the right materials to finishing your creation.
Choosing the Right Belt Sander

Before you start your knife-making journey, it’s essential to choose the right belt sander. Here are some factors to consider:
| Factor | Description |
|---|---|
| Size | Belt sanders come in various sizes, from small, portable models to larger, stationary units. Choose a size that fits your workspace and the type of knives you plan to make. |
| Power | Belt sanders range from low-powered models to high-powered ones. A higher-powered sander can handle more aggressive sanding tasks, but it may also be more expensive and noisy. |
| Speed | Belt sanders have adjustable speeds, allowing you to control the amount of material removed during sanding. Choose a sander with a speed range that suits your needs. |
| Features | Some belt sanders come with additional features, such as dust collection ports, variable speed controls, and adjustable sanding angles. Consider these features when selecting your sander. |
Once you’ve chosen the right belt sander, it’s time to move on to the materials and tools you’ll need for knife making.
Materials and Tools for Knife Making

Here’s a list of materials and tools you’ll need for belt sander knife making:
- High-quality steel blade material (e.g., 1095, 5160, or D2 steel)
- Wooden handle material (e.g., olive wood, micarta, or G10)
- Belt sander
- Clamping setup
- Hand saw or bandsaw
- File or bench grinder
- Sandpaper (various grits)
- Wood glue
- Wood finish (e.g., oil, wax, or lacquer)
With your materials and tools ready, you can begin the knife-making process.
Step-by-Step Knife Making Process

Here’s a step-by-step guide to using a belt sander for knife making:
- Design and Pattern: Start by designing your knife and creating a pattern. You can draw the pattern on paper or use a laser engraver to transfer it onto the steel blade.
- Prepare the Blade: Cut the steel blade to the desired length using a hand saw or bandsaw. File or grind the blade to the desired shape and thickness.
- Clamp the Blade: Secure the blade in the belt sander using a clamping setup. Ensure the blade is properly aligned and won’t move during sanding.
- Sanding the Blade: Start with a coarse grit sandpaper and gradually move to finer grits. Sand the blade until it reaches the desired shape and finish. Pay attention to the bevel and edge of the blade.
- Prepare the Handle: Cut the wooden handle material to the desired length and shape. Sand the handle to a smooth finish using sandpaper.
- Attach the Handle: Apply wood glue to the handle and insert it into the blade’s tang. Clamp the handle in place and let it dry.
- Final Sanding: Once the glue has dried, remove the handle and sand the blade and handle together. Use a belt sander to achieve a smooth, even finish.
- Finishing Touches: Apply a wood finish to the handle and any other desired areas. Allow the finish to dry and cure before using the knife. function pinIt() { var e = document.createElement('script'); e.setAttribute('type','text/javascript'); e.setAttribute('charset','UTF-8'); e.setAttribute('src','https://assets.pinterest.com/js/pinmarklet.js?r='+Math.random()*99999999); document.body.appendChild(e); }
