
Sand Wax Candle Making: A Detailed Guide for Aspiring Crafters
Embarking on the journey of sand wax candle making can be an incredibly rewarding experience. Not only does it allow you to create unique and personalized candles, but it also gives you the satisfaction of crafting something with your own hands. In this comprehensive guide, we will delve into the various aspects of sand wax candle making, from gathering the necessary materials to the final touches. So, let’s get started!
Understanding Sand Wax

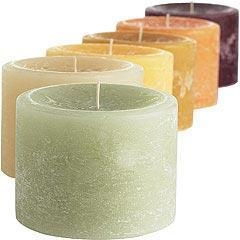
Sand wax, also known as sandalwood wax, is a natural wax derived from the sap of the sandalwood tree. It is known for its creamy texture, pleasant aroma, and ability to burn cleanly. Unlike traditional paraffin wax, sand wax is biodegradable and environmentally friendly, making it a popular choice among eco-conscious crafters.
Gathering the Materials

Before you begin, it’s essential to gather all the necessary materials. Here’s a list of items you’ll need:
| Item | Description |
|---|---|
| Sand Wax | High-quality sand wax suitable for candle making |
| Wick | Pre-waxed wick of the desired length |
| Container | A heat-resistant container for melting the wax |
| Double Boiler | Optional, but recommended for even melting |
| Colorants | Colorants of your choice for adding color to the wax |
| Scents | Essential oils or fragrance oils for adding scent to the wax |
| Thermometer | For monitoring the wax temperature |
| Sand | Optional, for adding texture to the candle |
Melting the Wax
Melting the sand wax is a crucial step in the process. Here’s how to do it:
- Measure the desired amount of sand wax and place it in a heat-resistant container.
- Heat the container over a double boiler or in a microwave, stirring occasionally, until the wax is completely melted. Be cautious not to overheat the wax, as it can become too hot and burn.
- Use a thermometer to monitor the wax temperature. It should be around 150掳F (65掳C) for optimal results.
Adding Color and Scent
Once the wax is melted, you can add color and scent to create a unique candle. Here’s how to do it:
- Add a small amount of colorant to the melted wax and stir until fully dissolved. Be cautious not to add too much, as it can affect the scent and burn time.
- Add your chosen scent by adding a few drops of essential oil or fragrance oil. Stir well to ensure the scent is evenly distributed.
Prepping the Container
Before pouring the wax into the container, it’s essential to prepare it. Here’s how to do it:
- Choose a container that is heat-resistant and has a wide opening for easy pouring.
- Insert the wick into the center of the container, securing it with a wick holder or a piece of clay.
- Place the container on a heat-resistant surface.
Pouring the Wax
Now it’s time to pour the melted wax into the container. Here’s how to do it:
- Slowly pour the melted wax into the container, ensuring the wick remains centered.
- Fill the container to the desired level, leaving a small space at the top for the wax to contract as it cools.
- Remove any air bubbles by gently tapping the container on a flat surface.