
Colored Sand Bottles Craft: A Detailed Guide for Creative Crafters
Are you looking for a unique and visually stunning craft project? Look no further than colored sand bottles. These captivating creations are not only beautiful to look at but also incredibly easy to make. In this guide, we will explore the various aspects of creating your own colored sand bottles, from selecting the right materials to adding personal touches. Let’s dive in!
Choosing the Right Materials

Before you start crafting your colored sand bottles, it’s essential to gather the necessary materials. Here’s a list of items you’ll need:
| Material | Description |
|---|---|
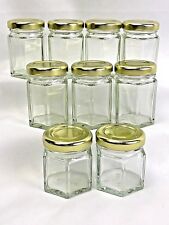
| Clear Glass Bottles | Choose bottles with wide openings to make it easier to add sand. |
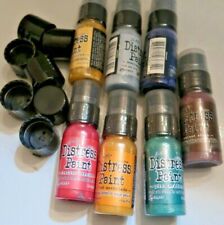
| Colored Sand | Available in various colors and textures, from fine to coarse. |
| Sand Funnel | Helps in pouring sand into the bottle without spilling. |
| Sealant or Epoxy | Used to seal the bottle and prevent sand from falling out. |
| Decorative Items (Optional) | Small trinkets, beads, or glitter to add a personal touch. |
Once you have all the materials, you’re ready to start crafting your colored sand bottles.
Preparation and Filling the Bottle
Start by thoroughly cleaning your glass bottles. This ensures that no dirt or residue remains inside, which can affect the appearance of your final product. Once the bottles are clean, you can begin filling them with colored sand.
Here’s a step-by-step guide to filling your colored sand bottle:
- Place your sand funnel over the opening of the bottle.
- Begin adding colored sand to the funnel, allowing it to flow into the bottle.
- Continue adding sand until you reach the desired height.
- Remove the funnel and tap the bottle gently to settle the sand.
- Repeat the process with different colored sands to create a layered effect.
For a more intricate design, you can add decorative items like small beads or glitter. Simply push them into the sand using a toothpick or a small tool.
Sealing the Bottle
After you’ve filled your bottle with colored sand and added any decorative items, it’s time to seal it. This step is crucial to prevent the sand from falling out and to ensure the longevity of your creation.
Here’s how to seal your colored sand bottle:
- Apply a thin layer of sealant or epoxy around the opening of the bottle.
- Use a brush to spread the sealant evenly.
- Allow the sealant to dry completely before handling the bottle.
- Once the sealant is dry, you can place the cap back on the bottle, if applicable.
It’s essential to ensure that the sealant is completely dry before using or displaying your colored sand bottle. This will prevent any sand from escaping and keep your creation intact.
Care and Maintenance
Colored sand bottles are relatively low-maintenance, but there are a few things to keep in mind to ensure they remain beautiful for years to come:
- Avoid exposing the bottles to extreme temperatures, as this can cause the glass to crack.
- Keep the bottles away from direct sunlight, as prolonged exposure can fade the colors.
- Handle the bottles with care to prevent any accidental damage.
With proper care, your colored sand bottles will be a stunning addition to your home or office for years to come.
Conclusion
Colored sand bottles are a fantastic craft project that combines creativity with visual appeal. By following this detailed guide, you can create your own unique and beautiful colored sand bottles. Whether you’re a seasoned crafter or a beginner, this project is sure to be a fun and rewarding experience. Happy crafting!