
Discover the Art of Disc Sanding Wood: A Comprehensive Guide
Are you looking to elevate your woodworking projects with a smooth, professional finish? Disc sanding wood is a technique that can transform your raw materials into works of art. In this detailed guide, we’ll explore the ins and outs of disc sanding, from the equipment you’ll need to the best practices for achieving a flawless finish.
Understanding Disc Sanding

Disc sanding is a method of smoothing wood surfaces using a disc sander, which is a power tool that features a rotating abrasive disc. This process is widely used in woodworking for its efficiency and ability to produce a consistent finish. Let’s delve into the basics:
| Disc Sander Type | Description |
|---|---|
| Belt Sander | Features a continuous belt coated with abrasive material. Ideal for large surfaces and fast sanding. |
| Orbital Sander | Utilizes a circular pad that moves in an orbital pattern. Great for finer sanding and contoured surfaces. |
| Detail Sander | Smaller and more precise, designed for sanding intricate details and tight spaces. |
Each type of disc sander has its own advantages and is suitable for different stages of the sanding process.
Choosing the Right Disc Sander
Selecting the right disc sander is crucial for achieving the desired results. Consider the following factors when making your choice:
- Size and Power: Ensure the sander is powerful enough for your project and has a comfortable grip.
- Speed and Adjustment: Look for a sander with variable speed settings and easy-to-adjust sanding pressure.
- Portability: If you plan to work in different locations, choose a sander that is lightweight and easy to transport.
Popular brands like Festool, Makita, and DeWalt offer a wide range of disc sanders that cater to various needs.
Preparation and Safety
Before you start sanding, it’s essential to prepare your workspace and ensure your safety:
- Protective Gear: Wear safety glasses, hearing protection, and a dust mask to protect yourself from debris and noise.
- Secure the Wood: Clamp your wood piece securely to a workbench to prevent movement during sanding.
- Check for Nails and Splinters: Inspect the wood for any nails, screws, or splinters that could damage the sander or cause injury.
Proper preparation not only ensures your safety but also contributes to a more efficient sanding process.
The Sanding Process
Now that you’re ready to sand, follow these steps to achieve a smooth finish:
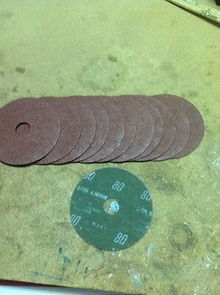
- Start with Coarse Grit: Begin with a coarse grit sandpaper (e.g., 80-120) to remove any rough spots or imperfections.
- Even Pressure: Apply even pressure while sanding to avoid creating uneven surfaces.
- Smooth Movements: Move the sander in a consistent, smooth motion across the wood surface.
- Change Grit as Needed: Gradually switch to finer grit sandpaper (e.g., 180-220) for a smoother finish.
- Inspect and Repeat: Regularly inspect the wood for any remaining rough spots and repeat the process as necessary.
Remember, patience is key when sanding wood. Take your time to achieve the desired level of smoothness.
Finishing Touches
Once you’ve achieved a smooth finish, it’s time to apply a finish to protect and enhance the wood’s appearance:
- Stain: Apply a wood stain to add color and depth to the wood grain.
- Sealer: Use a sealer to protect the wood from moisture and other elements.
-
function pinIt() {
var e = document.createElement('script');
e.setAttribute('type','text/javascript');
e.setAttribute('charset','UTF-8');
e.setAttribute('src','https://assets.pinterest.com/js/pinmarklet.js?r='+Math.random()*99999999);
document.body.appendChild(e);
}