
Diy Irrigation Sand Filter: A Comprehensive Guide
Are you looking for an efficient and cost-effective way to purify water for your garden or home irrigation system? A DIY irrigation sand filter might just be the solution you need. In this article, we will delve into the details of building and using a DIY irrigation sand filter, covering its benefits, components, construction process, and maintenance tips.
Understanding the Basics

A DIY irrigation sand filter is a simple yet effective water purification system that can be constructed using readily available materials. It works on the principle of gravity and the natural filtering properties of sand, gravel, and activated carbon. The filter removes impurities such as sediments, chemicals, and pathogens, ensuring clean and safe water for your plants or garden.
Components of a DIY Irrigation Sand Filter

Here are the essential components you will need to build a DIY irrigation sand filter:
| Component | Description |
|---|---|
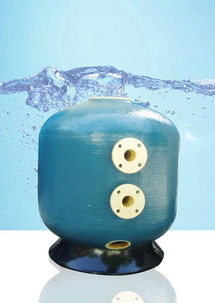
| Filter Tank | A container made of plastic, concrete, or metal to hold the sand and other filtering materials. |
| Sand | Quartz sand, with a particle size of 0.5 to 1.2 mm, is commonly used for its filtering properties. |
| Gravel | Gravel with a particle size of 2 to 4 mm is used to create a layer above the sand, allowing water to flow through more easily. |
| Activated Carbon | Activated carbon helps remove organic compounds, chlorine, and other chemicals from the water. |
| Filter Media | Filter media, such as polyester or polypropylene, is used to prevent the sand and gravel from mixing with the water. |
| Valve | A ball valve or a butterfly valve is used to control the flow of water into and out of the filter. |
Building Your DIY Irrigation Sand Filter
Follow these steps to build your DIY irrigation sand filter:
- Choose a suitable location for your filter tank, ensuring it is level and has good drainage.
- Prepare the filter tank by cleaning it thoroughly and ensuring it is leak-proof.
- Place a layer of filter media at the bottom of the tank to prevent the sand and gravel from mixing with the water.
- Add a layer of gravel on top of the filter media, followed by a layer of sand.
- Place the activated carbon on top of the sand layer.
- Connect the valve to the filter tank and ensure it is properly sealed.
- Fill the tank with water and allow it to settle for a few days to allow the sand and gravel to settle at the bottom.
- Backwash the filter by reversing the flow of water through the filter to remove any trapped particles.
Benefits of a DIY Irrigation Sand Filter
There are several advantages to using a DIY irrigation sand filter:
- Cost-Effective: Building a DIY irrigation sand filter is much more affordable than purchasing a commercial water purification system.
- Simple to Build: The construction process is straightforward and can be completed by anyone with basic DIY skills.
- Effective Filtration: The filter effectively removes impurities, ensuring clean and safe water for your plants or garden.
- Environmentally Friendly: Using a DIY irrigation sand filter reduces the need for chemical water treatment, making it a more sustainable option.
Maintenance Tips
Proper maintenance is crucial to ensure the longevity and effectiveness of your DIY irrigation sand filter:
- Regular Backwashing: Backwash the filter at least once a month to remove trapped particles and maintain its efficiency.
- Check for Leaks: Regularly inspect the filter tank and connections for any leaks or damage.
- Replace Filter Media