
Drill Disc Sander Attachment: A Comprehensive Guide
Are you looking to enhance your woodworking or metalworking projects with a drill disc sander attachment? If so, you’ve come to the right place. This guide will delve into the details of what a drill disc sander attachment is, its benefits, how to choose the right one, and how to use it effectively. Let’s get started.
What is a Drill Disc Sander Attachment?

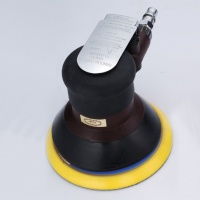
A drill disc sander attachment is a versatile tool designed to be mounted onto a power drill. It allows you to sand and finish wood or metal surfaces with precision and ease. The attachment typically consists of a sanding disc, a backing pad, and a mounting bracket that fits onto your drill’s chuck.
Benefits of Using a Drill Disc Sander Attachment
There are several advantages to using a drill disc sander attachment:
| Benefit | Description |
|---|---|
| Portability | Since it attaches to a power drill, the drill disc sander is highly portable and can be used in tight spaces. |
| Flexibility | It can be used for sanding curved or irregular surfaces that are difficult to reach with larger sanders. |
| Cost-Effective | Compared to a dedicated sander, a drill disc sander attachment is more affordable and requires less storage space. |
| Customizable | With various sanding discs available, you can achieve different sanding results depending on your project needs. |
How to Choose the Right Drill Disc Sander Attachment
When selecting a drill disc sander attachment, consider the following factors:
-
Compatibility: Ensure that the attachment is compatible with your power drill’s chuck size.
-
Disc Size: Choose a disc size that suits your project requirements. Common sizes include 4.5 inches, 5 inches, and 6 inches.
-
Back Pad Material: Some attachments come with a backing pad made of rubber or felt. The material should be suitable for the surface you’re sanding.
-
Mounting Bracket: The bracket should be sturdy and secure the attachment firmly onto the drill.
How to Use a Drill Disc Sander Attachment
Using a drill disc sander attachment is straightforward. Follow these steps:
-
Attach the sanding disc to the backing pad, ensuring it is securely fastened.
-
Mount the backing pad onto the drill’s chuck, and tighten it securely.
-
Choose the appropriate sanding disc for your project and attach it to the backing pad.
-
Start the drill and apply gentle pressure to the sanding disc while moving it across the surface you want to sand.
-
Use a consistent, even pressure to avoid creating uneven sanding patterns.
-
Change the sanding disc as needed to achieve the desired finish.
Conclusion
A drill disc sander attachment is a valuable tool for any DIY enthusiast or professional. Its portability, flexibility, and cost-effectiveness make it an excellent choice for a variety of sanding projects. By following this guide, you’ll be well-equipped to select the right attachment and use it effectively to achieve professional results.