
Festool Disc Sander: A Comprehensive Guide
Are you in the market for a high-quality disc sander that can elevate your woodworking projects to new heights? Look no further than the Festool Disc Sander. Known for its precision, durability, and innovative design, this tool has become a staple in the workshops of professionals and hobbyists alike. In this detailed guide, we will explore the various aspects of the Festool Disc Sander, including its features, benefits, and how to use it effectively.
Design and Build Quality

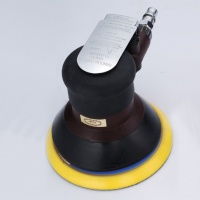
The Festool Disc Sander is a testament to the brand’s commitment to quality. Crafted from high-grade materials, this tool boasts a robust build that ensures longevity and reliability. Its sleek, ergonomic design not only looks impressive but also provides a comfortable grip, allowing for extended use without fatigue.
One of the standout features of the Festool Disc Sander is its dust extraction system. The tool comes with a built-in dust port that connects to Festool’s powerful dust extractors, ensuring a clean and healthy workspace. This not only improves the quality of your work but also prolongs the life of your sandpaper.
Features and Specifications
Here’s a breakdown of the key features and specifications of the Festool Disc Sander:
| Feature | Specification |
|---|---|
| Disc Diameter | 150mm (6 inches) |
| Max. Sanding Speed | 8,000 – 12,000 orbits/min |
| Weight | 8.6 kg (19 lbs) |
| Dust Extraction | Yes, compatible with Festool dust extractors |
| Variable Speed | Yes |
| Toolless Disc Change | Yes |
These specifications highlight the Festool Disc Sander’s versatility and precision, making it an excellent choice for a wide range of woodworking applications.
Benefits of Using a Festool Disc Sander
There are several benefits to using a Festool Disc Sander in your woodworking projects:
- Improved Sanding Results: The Festool Disc Sander’s precision and power ensure a smooth, even finish on your workpieces.
- Reduced Dust and Mess: The dust extraction system keeps your workspace clean and your lungs healthy.
- Increased Productivity: The tool’s ergonomic design and powerful motor allow for efficient sanding, saving you time and effort.
- Longevity: The high-quality construction and durable materials ensure that your Festool Disc Sander will last for years to come.
How to Use the Festool Disc Sander
Using the Festool Disc Sander is straightforward. Here’s a step-by-step guide to help you get started:
- Attach the Disc: Remove the old sanding disc and replace it with a new one. The toolless disc change feature makes this process quick and easy.
- Connect the Dust Extractor: Attach the Festool Disc Sander to your dust extractor using the provided adapter.
- Adjust the Speed: Set the desired sanding speed using the variable speed control.
- Position the Sander: Place the Festool Disc Sander on the workpiece, ensuring that the sanding disc is in contact with the surface.
- Sand the Surface: Move the sander in a straight line, maintaining even pressure on the workpiece. Avoid sanding in circles or curves, as this can cause uneven results.
- Change the Disc: Once you’ve achieved the desired finish, remove the sanding disc and replace it with a finer grit if necessary.
By following these simple steps, you’ll be able to achieve professional-grade sanding results with your Festool Disc Sander.