
Finger Belt Sander: A Comprehensive Guide
Are you looking to enhance your woodworking or metalworking projects? If so, a finger belt sander might be the perfect tool for you. This versatile tool is designed to provide precision and efficiency in sanding tasks. In this article, we will delve into the details of a finger belt sander, covering its features, benefits, and how to use it effectively.
Understanding the Basics

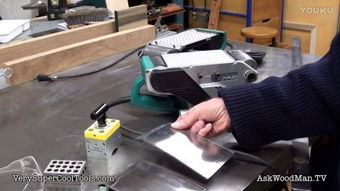
A finger belt sander is a compact and portable tool that uses a sanding belt to smooth and finish surfaces. Unlike traditional sanders, which use a stationary abrasive disc, a finger belt sander allows for more flexibility and control. It is ideal for sanding curved or irregular surfaces, making it a favorite among woodworkers and metalworkers alike.
Here are some key features of a finger belt sander:
- Compact Design: The tool is lightweight and easy to handle, making it perfect for sanding in tight spaces.
- Variable Speed: Most finger belt sanders come with adjustable speed settings, allowing you to tailor the sanding process to your specific needs.
- Multiple Sanding Belts: These sanders often come with a variety of sanding belts, providing you with the flexibility to choose the right grit for your project.
- Comfortable Grip: The ergonomic design ensures a comfortable grip, reducing hand fatigue during prolonged use.
Benefits of Using a Finger Belt Sander
Using a finger belt sander offers several advantages over traditional sanding methods. Here are some of the key benefits:
- Increased Efficiency: The belt sander’s continuous sanding action allows for faster and more efficient sanding compared to manual sanding.
- Improved Sanding Quality: The belt sander provides a more consistent and even sanding finish, reducing the risk of uneven surfaces.
- Reduced Hand Fatigue: The ergonomic design and lightweight nature of the tool help minimize hand fatigue, allowing for longer sanding sessions.
- Cost-Effective: A finger belt sander is a cost-effective solution for sanding tasks, as it eliminates the need for expensive sandpaper and sanding blocks.
How to Use a Finger Belt Sander

Using a finger belt sander is a straightforward process. Here are the steps to follow:
- Choose the Right Sanding Belt: Select the appropriate sanding belt for your project, considering the material and desired finish.
- Attach the Sanding Belt: Place the sanding belt in the sander’s belt track and secure it in place according to the manufacturer’s instructions.
- Adjust the Speed: Set the desired speed based on the material and sanding requirements.
- Position the Sander: Hold the sander with both hands and position it on the surface to be sanded.
- Maintain a Steady Pressure: Apply a steady pressure while moving the sander across the surface, ensuring even sanding.
- Monitor the Sanding Process: Keep an eye on the sanding process to ensure a consistent finish and avoid over-sanding.
- Change the Sanding Belt as Needed: Replace the sanding belt when it becomes worn or when a different grit is required.
Comparing Finger Belt Sanders
When shopping for a finger belt sander, it’s essential to compare different models to find the one that best suits your needs. Here are some factors to consider:
| Feature | Model A | Model B | Model C |
|---|---|---|---|
| Maximum Speed (RPM) | 10,000 | 12,000 | 8,000 |
| Weight | 2 lbs | 3 lbs | 1.5 lbs |