
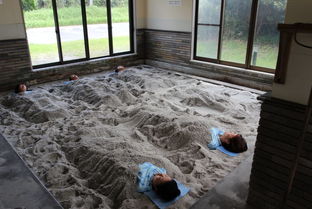
Wooden Sand Bath DIY: A Detailed Guide for Relaxation at Home
Creating your own wooden sand bath at home can be a rewarding and relaxing DIY project. Not only does it provide a unique spa-like experience, but it also allows you to customize it to your liking. In this guide, we’ll walk you through the process of building a wooden sand bath, from selecting the right materials to adding the finishing touches.
Choosing the Right Materials

When it comes to building a wooden sand bath, the choice of materials is crucial. Here are some key considerations:
| Material | Description | Why It’s Important |
|---|---|---|
| Wood | Choose a durable, weather-resistant wood like cedar or redwood. | Wooden sand baths are exposed to outdoor elements, so it’s important to select a material that can withstand the weather. |
| Hardware | Use galvanized or stainless steel screws and bolts to prevent rust. | Rusting hardware can weaken the structure and lead to leaks. |
| Sealant | Apply a water-resistant sealant to protect the wood from moisture. | Moisture can cause the wood to rot and weaken over time. |
Once you’ve selected the appropriate materials, it’s time to start building your wooden sand bath.
Designing Your Wooden Sand Bath
Before you begin construction, it’s essential to have a clear idea of the design for your wooden sand bath. Consider the following factors:
- Size: Determine the dimensions of your sand bath based on the available space and your preferences.
- Shape: Choose a shape that complements your outdoor space, such as a rectangle, oval, or circular design.
- Depth: Ensure the depth is sufficient to allow for a comfortable sitting or lying position.
- Seating: Decide whether you want a built-in bench or a separate seating area.
Once you’ve finalized the design, sketch it out on paper or use a computer-aided design (CAD) program to create a detailed plan.
Building the Wooden Sand Bath

Follow these steps to build your wooden sand bath:
- Prepare the Wood: Cut the wood to the desired dimensions and sand it smooth to prevent splinters.
- Construct the Frame: Assemble the frame using the wood pieces, ensuring that the corners are square and the frame is level.
- Attach the Bottom: Secure the bottom of the frame to the frame using screws and bolts.
- Build the Sides: Attach the side panels to the frame, making sure they are plumb and level.
- Install the Lid: If you’re adding a lid, construct it and attach it to the frame using hinges.
- Seal the Wood: Apply a water-resistant sealant to the wood to protect it from moisture.
After completing these steps, your wooden sand bath should be ready for use.
Adding the Finishing Touches
Once your wooden sand bath is built, it’s time to add the finishing touches:
- Fill with Sand: Choose a fine, clean sand that won’t irritate your skin. Fill the sand bath to the desired level.
- Decorate: Add plants, stones, or other decorations to enhance the aesthetic appeal of your sand bath.
- Install Lighting: Consider adding solar-powered or battery-operated lights to create a relaxing ambiance.
With your wooden sand bath complete, you can now enjoy a tranquil and rejuvenating experience in the comfort of your own home.
Conclusion
Building a wooden sand bath is a rewarding DIY project that can provide years of relaxation and enjoyment. By carefully selecting the right materials, designing a